
So in my last post I talked about purchasing an expired domain to gain some SEO advantage over the competition. In today’s post I’ll talk about how to set up an affiliate website using WordPress as the content management system.
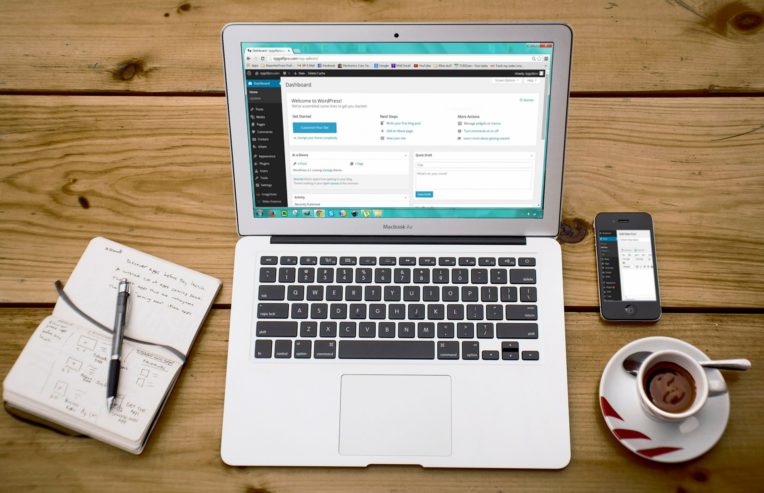
If you read my last post, you will know I purchased a promising expired domain, with a good backlink profile. Now it’s time to activate the domain and install WordPress on it and start creating content.
I will show you exactly how I setup my fresh WordPress installation to optimize SEO, usability and security. There are also couple important legal notifications that are pretty much required on every website, especially if you intent to use affiliate marketing on the site.
If you are new to affiliate marketing or blogging it can be really overwhelming to even set up WordPress. Just think about how hard this stuff was a decade or two ago when content management system really weren’t a thing. You had to know A LOT more technical stuff just to get a website up and running.
Even though setting up WordPress can seem complicated it really isn’t. You just have to know what to do. WordPress being as popular as it is, means there are a ton of free tutorials, themes and resources. Too many actually.
The problem is with finding what is important and what is not. You can spend hours and hours reading about plugins and end up more confused than you were when you started.
The steps I’m about to show are very simple, but every one of them is important and hours of research has been put behind them. So without further ado, let’s get to it!
1. Installing WordPress
Naturally we will start by installing WordPress on our domain. I will not walk you through this as there are plenty of tutorials that show this step-by-step depending on where you host your domain.
Most of the larger hosting companies these days offer a one click WordPress install, since it is the go-to CMS for most bloggers and casual webmasters. If you are on a hosting service/server that requires you to do it manually you probably won’t end up reading my material any ways.
On the other hand if your hosting service requires manual installation through FTP and you don’t know how to do it, just chance your service provider. The internet has evolved sot that you don’t need to know or even understand all the technical stuff anymore. Sure, it can help, but creating a successful, profitable website is completely doable without prior technical knowledge.
I use Wealthy Affiliate as my hosting service currently, since they offer a very easy and fast user interface which allow me to focus my efforts on the stuff that really matter like SEO, content creation and research. So it’s a resource thing really. I would love to know more about the tech stuff but currently I simply don’t have the time.
Fortunately I grew up in a time where I had to create my first website in raw HTML and know how to use FTP. But that just means I’m getting old I guess :).
2. Choosing a theme
The first thing we’ll do after installing WordPress on our domain is choosing a WordPress theme. There are couple things I look for in a theme.
Firstly it has to look clean. By that I mean I don’t want tons of columns, widgets and changing pictures. Of course this depends somewhat on the site and what it’s geared towards. But especially on a blog I want everything to be super clean and simplistic.
The reason for this is that simple and minimalistic themes load faster, which is increasingly important for ranking in searches engines. Simple layouts also work better in mobile devices. They generally show the reader only the main column content and a simplified menu. That’s why you want anything worth reading be in there.
Secondly, a theme has to be modular. By this I mean I have to be able change the header and footer layouts, the widgets, colors and fonts. The reason for this is that changing a specific part of your website layout can be a real pain in the ass. You don’t always get that with free themes but I prefer modularity when possible. Sure you can always edit the CSS but that requires extensive research and you risk losing your modifications on every theme update.
You can of course change your theme any time you wish in WordPress. There are some risks however and the larger your site gets the larger and more likely the risks get. Things like broken links and misplaced content are known to happen, so always back up your site before installing a new theme.
For my expired domain project I chose a theme called Shuttle Corporate by Shuttle Themes.
 To be honest I just browsed through the themes featured in Wealthy Affiliates website installer and went with this one as it seemed clean and pretty simplistic.
I’m not 100% sure with the direction of the site and this seemed like something that go with a simple blog or with more of a business/authority site.
Just as I’m writing this WordPress 5.0 rolled out and it has a completely new feature called box editor. It seems like something I could use to create a whole layout instead of a theme. I have to do some research and I promise to write more about it in the future!
3. Removing test post and page
WordPress publishes a test page and a test post when first installed. It goes without saying these add no value to your website, so remove them. You can find them – not surprisingly – under the posts and pages tabs in your WordPress interface.

You then just hover over them with your mouse and choose Trash. And it’s done just like that! Now repeat on the post/page.
4. Installing Plug-ins
Next it’s time to install some important plug ins. These are the ones I know I’ll need on every site and install them straight away. I use other and without a doubt you will as well. Just be aware some plug-ins can slow your website down and just having too many in general is a bad thing.
You need to go to the Plugins tab in your WordPress interface and click on the ‘Add new‘ and search for each plugin manually.
The plugins I install on a fresh WordPress are:
- All in one SEO Pack, an SEO optimization tool. This one is important and comes pre-installed on every WA WordPress site.
- Comment link Remove, This removes the links from comments people leave on your posts. After reading a lot about backlinks I’m convinced you shouldn’t have any unintentional outward links on your site even if they are NoFollow. Different themes handle the comment section differently so this plugin is great for making sure your comments aren’t spammed with unwanted links.
- Cookie Notice This plug-in shows a small popup banner that notifies users about cookies. It’s function is to makes sure your site complies with the UK and EU Cookie and GDPR regulations.
- EWWW Image Optimizer Compresses images without losing quality. Very important for fast load times, which is an important ranking factor.
- Pretty links Helps to mask long and nasty looking affiliate links.
- WP GDPR Compliance, Like cookie notice, this one is required because of the EU GDPR regulations. Asks a permission to store comment contact details. Also, makes it possible for users to request any data stored about them.

You can spot from the above screenshot there are couple other plug-ins installed, like Redirection and YouTube. These are something I might use on that site but they are not something you have to have installed.
Redirection is great for redirecting moved content as Google doesn’t like 404 errors. The YouTube plugin gives some options to your standard WordPress video embed features.
Finally, you will need to activate all the plugins. You can do it individually on every plugin or just activate everything and update as a bulk action.
5. Set up All-in-one SEO
So now that we have our plugins installed, it’s time to set up All in one SEO. Go to the All in one SEO general settings page.

For now, we are going to leave everything as is, except for two things. We are going to add a home title and a home description. These are important because they are essentially your calling card in the eyes of the search engines and their users. So make a snappy home title and describe what your site is about in couple short sentences. Try to make it intriguing.

The other item we are going to edit is the Keyword settings. Just enable it and let it do it’s magic. No need to edit other attributes here.

6. Set up GDPR Compliance plugin
Next I will setup the GDPR Compliance plugin. This one won’t affect your rankings but it’s important from a legal perspective. The GDPR regulations of the European Union dictate all websites that have users from within the EU to inform what user data is being gathered and stored, how that data is being stored and contact information for removal of said data.
The GDPR legislation is meant to offer protection of personal data and privacy. It has caused a lot of hassle to all businesses in the EU but the goal behind is noble. Think of it what you will, but if you have visitors on your website from within the EU, you need to have this setup to have all your bases covered from a legal standpoint.
The other option is to blog traffic from EU but that would be stupid as that’s a good third of internet users who seek information in English.
Setting up the plugin is pretty straight forward. Just go to your installed plugins and scroll down to the GDPR compliance plugin and click settings.

Activate the WordPress comments fields. This will ask any comment for a permission to store their contact information.
Next go to the Settings tab and activate the Request User Data page. It will create a page called Data Access Request. You will find it under your pages section, it will not be visible by default so go to the page and change the visibility to public.

That’s it for the GDPR!
7. Set up the Comment link remove plugin
Finally we will setup the Comment link remove plugin. Like I said before this is important for controlling the outward links of your website that could lead to negative SEO results.
If you use a theme that allows to remove the comment link option you might not need this. On the other hand if you decide to change your theme later on you might activate the comment links by accident and this plugin would take care of that.
If you already have a site with comments, you can use this plugin to remove the links from them as well.

Go to the QC CLR settings tab in your WordPress interface and in the General Settings choose
- Remove WEBSITE field from comment form
- Remove hyper-link from comment AUTHOR bio
- Disable turning URLs into hyperlinks in comments
- Remove HTML comments globally
-
-
There’s no need to touch the other settings. Save changes and you’re good to go!
You’re good to go!
The rest of the plugins I introduced in this post don’t need settings changed for now besides being activated. You can edit their settings as you see proper when you learn more about this stuff and have a better vision about your website and content.
That’s it with the basic settings and plugins! Now it’s time to start creating some incredible content. You should start with creating a Privacy Policy and an about me page like shown in the Wealthy Affiliate training.
The first level of the training is completely free by the way and full of great information. You just need to create an account, they don’t even ask for your credit card so there are no strings attached.
I’ll continue by creating some content on my expired domain and I still have my Keyword Golden Ratio project to work on as well. I wonder where I’ll find the time to run all three websites :). So wish me luck and check back soon for updates!
P.S. I’m sure I left some important stuff and steps out so don’t hesitate to ask on the comments section below. I promise to answer as soon as possible!
14 replies on “How to set up an affiliate website in WordPress”
very informative i personally find it easy to understand
Thanks for the comment Vernon.
Hi, Jukkah You a good looking website here it’s full of useful info and it’s very well laid out and also easy to navigate.
Dave
Thanks Dave!
This was a splendid how to guide. I have always wanted to know how to install wordpress on a site that has never had it before. I have looked at purchasing affiliate sites which are already generating revenue and I have almost taken the plunge, but not quite yet. I will keep this article in my back pocket.
I do have a question though. You wrote in the first couple paragraphs that you bought an expired domain with a good back link profile. What exactly does a “good back link profile” mean? It has always been a term that has puzzled me. I look forward to reading your response.
Thank you for sharing and I hope you make it a great day!
Thanks Alex! Concerning backlinks check the post I linked to in the first paragraph of the post. Backlinks are essentially links pointing to your domain just like the name suggests. Even though some claim backlinks aren’t important for SEO they are actually probably in the top 3 ranking factors for Google. Backlinks were easily manipulated and over optimized in the past but since Google appreciates natural links – the idea being they show how relevant other sites think your website is – the frown upon building links intentionally. So essentially a “good back link profile” means it has some high value, non-optimized, dofollow links. A bad backlink profile would be, for example thousands of links from low value sources like blog comments with over optimized anchor text.
The domain I bought had couple high value, dofollow links from a new agency and a business registry. Only time will tell if they offer any “link juice” to increase SEO. Is this a white hat (aka “legal” in Googles eyes) tactic? Maybe not completely, but since they weren’t built intentionally by the current owner and there are only couple of them it would be pretty strange to get penalized.
Hi Jukka. The information you gave makes it so much easier to set-up your own WordPress, SEO settings and so much more. Keep it up.
Cornelius
Thanks for the comment Cornelius!
Another great post! I’m still new to word press and I found this article very useful, I’d recommend this post to anyone using word press! I found the information on plug ins very useful and will be sure to download them. Is there any other plug ins you recommend?
One that instantly comes to mind is UpdraftPlus backup plugin. It’s great for making fast and complete backups of your site before major updates in case something goes wrong. It’s always wise to make regular backups as you never know when your site might get hacked. On the other hand every plugin you have increases your chances of getting hacked as there can be security issues within them. So I avoid installing anything I absolutely don’t need and trust and keep everything up to date.
This is such a great and useful article about website building on wordpress. Very useful and easy to understand way of writing makes it easier to understand for newcomers. I am really looking forward for more useful posts from you as I also own a website and I am sure I will get a good help from your website. Thank you.
Thank you Sara! I wish you good luck with your website.
A very thorough and complete review of work related businesses. Well laid out and easy to read. I have, however, limited interest because I’ve been retired for 13 years. But a young person, such as a student, would find your blog very useful as they enter the work force.
Glad you liked the copy Chris! I actually think retirees looking for additional income can find work through staffing agencies a bit easier as well. Of course it depends where you live. In some countries it’s almost impossible to work once you are retired.